You’ve tossed a few PokéBalls, caught a few Caterpies, and spun your way to a few items at the PokéStop, but it’s time to take things to the next level. These tips and tricks will help you go from novice trainer to unbeatable gym leader faster than you can spit out the PokéRap.
Swipe the PokéBall Button for Quick Menu Access
The PokéBall icon at the bottom of your screen is used to access most of the in-game menus, like your Pokédex, Items, captured pokémon, and the Shop. You can tap the PokéBall icon and navigate to these menus, or you can look like a pro and get to them with a single swipe. Swipe the PokéBall left to instantly access the Pokémon menu, swipe right to go right into your items, and swipe up to access the shop.
See at a Glance Why a Wild Pokémon Appeared
Increase Your Chances of Catching Pokémon, and Earn More XP
It might seem easy at first, but catching pokémon gets harder as you level up. You start running into stronger pokémon, and your once-massive stash of PokéBalls will start to dwindle if you don’t learn the ins and outs of the perfect throw. When you see a pokémon appear, tap it on your screen, then move to a spot where you’re safe and out of the way. Once you’ve started an encounter, the pokémon will stay on your screen until you either catch it or runs away because of too many failed attempts.
When the encounter starts, you’ll notice a white circle around it. That’s the target you have to hit for your PokéBall to work at all. Inside the white circle, however, is a constantly-shrinking, colored circle (more on that later) that tells you how difficult it will be to catch the pokémon. Your goal is to toss your PokéBall and hit the inside of the shrinking, colored circle. Doing so will grant you more experience points (XP) depending on the size of said circle:
- A “Nice!” toss happens when you get it inside the colored circle while it’s fairly large, and will grant you an additional 10 XP if you make the catch.
- A “Great!” toss happens when the colored circle is about half the size of the white circle, and will grant you an additional 50 XP.
- An “Excellent!” toss happens when the colored circle is very small, and will grant you an additional 100 XP.
Those XP bonuses may not seem like much on their own, but they make a huge difference over time, especially if you have an item like the Lucky Egg activated, which doubles XP gained for 30 minutes. A good toss and Lucky Egg can turn an encounter with a common pokémon like Pidgey—which would normally only net you 100 XP—into a much more profitable catch. Not only would you get 200 XP for the catch, but an “Excellent!” toss and curveball bonus would add another 220 XP, making that little Pidgey worth 420 XP. It’s almost as much as the bonus for catching it for the first time.

As mentioned earlier, though, some pokémon are much harder to catch, and it all depends on the color of their shrinking circle. Red means very hard, orange means hard, yellow means moderate, and green means easy. For red, orange, and yellow pokémon, a few items will help ensure you make your catch. Razzberrys will lower the difficulty of catching a pokémon by one color, but they are only good for one attempt. If the pokémon breaks free, you’ll need to use another. Using GreatBalls or UltraBalls will increase your chances as well, but you have a much more limited supply, so save them for the really tough pokémon.
Optimize Your Pokémon Training and Evolving
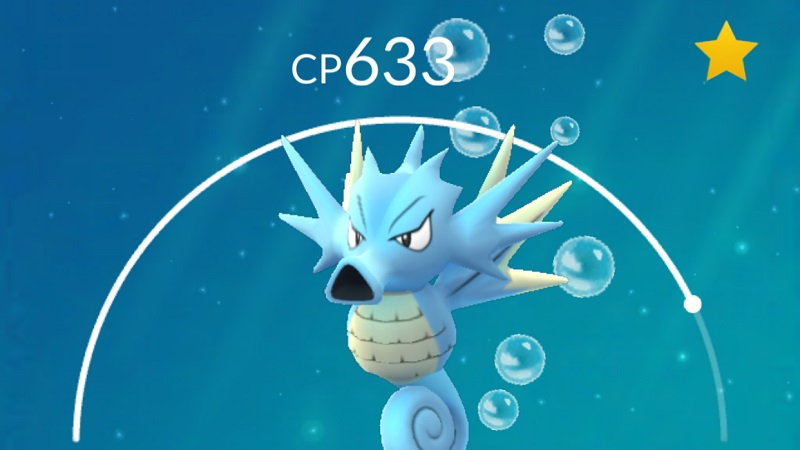
You find two Charmanders, one with a CP of 230, and another with a CP of 450. You keep the Charmander with 450 CP (maybe tag it with a favorite star so you know it’s your best), then transfer the other Charmander to the Professor to get a Charmander candy. You don’t power up the Charmander you kept, but wait until you have enough candies to evolve it into a Charmeleon. Again, you don’t power it up, but wait until you have enough candies to evolve it into its final form, Charizard. Only then do you begin to use the stardust you saved to power up your Charizard.If you want to find pokémon with higher CPs, you need to increase your trainer level. Niantic, Pokémon Go’s developers, have been very quiet about how CP works, so here are a few more things you might want to know about it:
- All pokémon of a certain type have the same maximum CP, regardless of what their CP was when you caught them. Basically, a 100 CP Charmander and 450 CP Charmander have the same maximum potential, and that is determined by your trainer level. It’s still best to keep the higher CP one, though, because you’ll save yourself resources powering it up in the long run.
- Some species of pokémon have a higher maximum CP than others.
- If your trainer level increases, the maximum CP of all your pokémon increases. That means the pokémon that belong to a trainer at level 20 all have a higher CP cap than those that belong to a trainer at level 10.
- Evolving a pokémon will raise their current and maximum CP, but the percentage trained will remain the same. For example, a 20 CP Pidgey with a max of 100 might evolve into a 40 CP Pidgeotto with a max of 200—it stays at 20%.
Boost Your Trainer Level Quickly With the Lucky Egg Trick
Pro tip: don’t evolve Pidgeottos into Pidgeots while you do this! Evolving four Pidgeys into Pidgeottos will cost you 48 candies and net you 4000 XP with a Lucky Egg activated, but just one Pidgeot will cost you 50 candies and only get you 1000 XP with a Lucky Egg. Do the math before you undo all your hard work. Also, Nick Steinberg at Goliath points out that you can battle with pokémon and wear them out before you evolve them. Go fight at an enemy gym with some pokémon and they’ll be returned to full health once they’re evolved.
Track Pokémon and Use Tools to Find the Ones You Don’t Have
Tracking pokémon isn’t an exact science, so there’s no way to guarantee the finding and capturing of anything. Still, the video above from the GameXplain YouTube channel recommends a few tips that make it a little easier: Three paw prints means the pokémon is within a kilometer of your location. Two paw prints means the pokémon is 100 meters away, and one paw print means the pokémon is just 10 meters away (these distances are not yet confirmed, but highly likely). If you see no paw prints, you’re practically on top of that pokémon’s location. Don’t select a single pokémon to track. Keep the entire tracking tab open so you can see pokémon change order based on their location nearby. Pokémon in the top left are the closest to you, and the ones in the bottom right are the farthest away. Choose a pokémon you want to track on the list, then pick a direction. Watch to see if it’s position or paw prints change. If it moves down the list or gets more paw prints, you went the wrong way. Using the process of elimination to track a pokémon can be frustrating, but for now that’s the best way to do it. Unfortunately, the “three-step glitch” is currently making this process harder than usual, but a fix is on the way. If you’re after a specific type of pokémon, tools like Poke Radar let trainers show where they captured what. Different areas have higher chances of spawning certain pokémon. If you know where these areas are, you can frequent them more often and increase your chances of filling up your Pokédex.
Know Your Eggs and Hatch Them Fast
You also need to hatch your eggs as soon as possible when you get them. The CP of the pokémon inside is based on your trainer level when you acquired the egg, not when it hatches. Plus, once you hit the limit of eggs you can carry (9), you can’t pick up any more. You could be a level 20 trainer, but if all the eggs you have were collected when you were level 5, they won’t turn out so great when they hatch. So get walking, running, biking, or consider using some tools if you need help, because the faster you hatch your eggs the better.
For the amateur trainer, gym battles often turn into a messy, tap-fest, where pokémon defeat other pokémon through sheer brute force. The video above, from the Tech Insider YouTube channel, demonstrates a better way to battle. It comes down to a few key moves: Always use your six strongest pokémon when taking on an enemy gym—my friends and I call them bunker busters—and make sure they’re all healed up before you fight. When the fight starts, wait for the screen to flash yellow. When it does, swipe right or left and you’ll dodge their attack. This flash is present throughout the entire match, so you can follow the same pattern of flash, dodge, attack until the battle is over. Not every ability is dodgeable, like “Earthquake,” but most are. Defending pokémon attack every 1.5 seconds, so keep that in mind as you plan your dodge and attack pattern. Don’t try to attack too much after each dodge. When it’s all done, you can leave a pokémon to defend the gym for your team. It’s tempting to leave your best pokémon, but go for your second or third best instead. Keep your best as your bunker buster and use the rest of your strong pokémon as seeders for holding and defending gyms. Holding gyms is how you earn PokéCoins to spend in the Shop (10 per gym held), and you can earn a maximum of 100 PokéCoins every 24 hours (or 10 different gyms).
If you want to focus on increasing your trainer level instead of earning coins, however, I wouldn’t recommend spending much time trying to build up and defend the gyms you take over. You earn five times as much XP for defeating and taking a gym than you do for training at one of your own to bolster its defenses. Also, training up a gym is a much bigger time sink since you can only train with one of your pokémon at a time, as opposed to the six you can use when attacking another team’s gym. Just like with powering up your pokémon, focus on your trainer level first, and worry about holding gyms for your team later.

