Showing posts with label Nail polish. Show all posts

May 1, 2013

Photo Collection: Nails I love!

Google
Somehow I went from doing my nails almost every other day to not doing them at all. They are plain right now. Plain, no polish, not even a clear strengthener. Maybe I work too much? I feel like I can't find time to focus on myself these days because I am too busy taking care of everyone else. My dad's dog needed a hair cut. My boyfriend's broken bones from his motorcycle accident. Working full time. These pictures remind me of all the time I used to have. Now I'm lucky to get a load of laundry done or pluck my eye brows. I just really hope that things go back to the way they were fast so I can do fun stuff like this again.


June 25, 2012

Digusting Pedicures!

Google This irks me. When women get a pedicure and get acrylic or gel. Or just long toenails in general.
Ladies, please, if your toenails are this long please please please cut them! Your toenails should not be longer than the end of your toes. Don't let them get longer! This has to be one of the most unattractive things a woman can do. Trim your dragon claws!

It doesn't matter how you paint them what shoes you're wearing! I also don't think that women should wear a French Manicure on their toes! No toe is should grow to the length to show the whites of your nail. That means your toenails need to be clipped, not enhanced by white paint. I think of Velociraptors from Jurrasic Park every time I see a Frenched foot with that big claw just tapping on the floor!

Why would anyone want long toenails?  Don't get gel or acrylic. Wear a solid color or just get them buffed and polished clear, it's one less thing you'll need to worry about maintaining! Because you don't want this, it's gross! They are like talons! Guaranteed to make holes in your socks and tights!

What do you think?
Have you ever had your toe nails like this?
What are some of your pet peeves you find unattractive?


Enhanced by Zemanta

April 21, 2012

Product Review and Survey: Sally Hansen Salon Effects


Salon Effects
Sally Hansen has come out with an ingenious product and other companies are following quickly in their trail! I am actually surprised that nail polish companies didn't develop this concept a lot sooner, but then again it would probably put them out of business. I'm not joking! These things are amazing! I have used this product about 10 times and I am hooked! They are easy to apply, last for over 2 weeks (and I'm a server constantly washing dishes at work and using my hands) and are better compared to other brands on the market.


These are nail strips that are a sticker that is applied directly on your nail, smoothed out and filed down to fit perfectly around your nail. No drying time at all. This is perfect for a busy mom, or for the gal that doesn't have a lot of time to wait on drying or make it to the salon. It's actually a cheaper false nail alternative. Yes you can have beautiful nails and no they don't have to be fake!  These strips come in so many styles to choose from. Bringing a little style other than a basic color. Here are the one's I recently applied! Sally Hansen has found itself a life long customer as long as they keep these babies on the market! And they just came out with a whole new Avril Lavigne line which I'm ashamed to say are really cute!


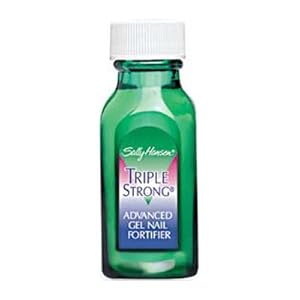
Can be found at drugstores for about $8-$10 and includes 16 strips. It claims to last for 10 days. But I've been able to keep mine for much longer with care and lots of Sally Hansen Triple Strong Nail Fortifier.


The Other Guys 
I've also tried Kiss Nail Dress. Their motto "Fashion that Sticks" could NOT be more the contrary!  They do no adhere easily to the nail and don't last as long as Sally Hansen's Salon effects. Although they come with jewels and trendy patterns and are very alluring I honestly believe that Sally Hansen has the better product here for your money. 

Kiss Nail Dress costs just about the same but Sally beats them by a land slide when you go to remove them. Nail Polish remover or pure acetone works best. Salon effects are easily removed however Kiss Nail Dress are almost impossible to remove even with pure acetone and leave debris. They use up a LOT of cotton balls and a LOT of acetone.

Now every time I used one of the Sally Hansen Salon Effect products I had some left over stickers. I saved them up for future use, even though I didn't really have an idea of what I would use them for. One thing I will give Kiss Nail Dress credit for is this little nifty insert because now I know what I will do with my Sally Hansen Salon Effects left overs!

I will end up polishing my nails with solid colors and cut the Salon effects into shapes and create a look like these in the picture above. I will be sure to post pictures once I do it! You can go out and try the Nail Dress or you can take it from me but I really think Sally Hansen takes the cake on this one!
Enhanced by Zemanta
Click here to take survey Google

March 24, 2012

Thread Wrapped Love Necklace


I was recently browsing Anthropologie's website, and came across this necklace below. It's adorable and fun, but I knew it could definitely be made for much less than $48. The supplies are also pretty basic, so I didn't even need to buy additional materials. If you're an avid DIY'er, there's a good chance you have everything on hand!

Thread-Wrapped Sentiment Necklace, $48 (Photo: Anthropologie.com)


I opted for a charm instead of a tassel, but you can obviously use whatever you'd like. Check out how I made it below!


Supplies:


- Craft wire (I used 24 gauge)
- Embroidery thread, one skein
- Scissors
- Round nosed jewelry pliers
- Chain (length is up to you)
- Clear nail polish (you'll use this in more than one way!)
- Jump rings and jewelry clasp (optional)
- Charm or tassel (optional, not shown)
- Ruler (not shown)


1) Cut a length of wire. About 10 or so inches should be enough. Using the round nosed jewelry pliers, create a look at one end of the wire.


2) Keeping the skein of thread in tact/in the packaging (this makes it easier to work with), tightly tie the thread near the loop you just made. Triple or quadruple tie it for extra security.


3) Begin tightly wrapping the thread around the wire. I found that it was easier to do this if you hold the entire skein of thread in one hand while wrapping. Be sure to wrap the thread as tight as possible.


4) Continue wrapping the thread, until you've reached about 9 (or so) inches of wrapped wire.


5) Tightly triple or quadruple knot the thread.


6) Cut off the excess thread, and secure the knot with clear nail polish. Let dry.


7) Cut off the excess wire, leaving about half an inch. Use the pliers to create a loop, just like you did earlier.


8) Go back to the end that you started with, and cut off the excess thread. Secure with clear nail polish and let dry.


9) Start creating the "L" at one end. Bend the wire to the left, like the first picture above. Wrap the wire back over to the right, around the pliers as shown above. This will create the bottom portion of the L.


10) To make the "O", wrap the wire around the cap of the nail polish bottle. This will help guide the general shape. Remove the bottle and mold the "O" as you wish.


11) After you're done with the "O", make the sure the wire is bending up, like the first picture above. Sharply bend it back down to begin the "V". Tighten the sharp bend by squeezing it with the pliers.


12) Bend the wire back up, then horizontally. This will create the "V".


13) Wrap the wire around and over the pliers for the "e".


14) Bend the wire back up to complete the last letter.


15) Attach the chain to both ends. You can either use jump rings, or simply open up the loops with the pliers. You can also attach the chain to one end of the pendant, so that it hangs differently. It's totally up to you.


16) Attach a charm or tassel, if you'd like. I decided to add a vintage gold charm.


Pretty easy! With some practice and playing around, I'm sure you can create other words as well. Each one for a lot less than $48, too!

Thanks Kristen from Studs and Pearls for this DIY
You can see her orignal post here.


Enhanced by Zemanta